
Content
This purpose of this document is to help people new to
AniTa to better understand which features to use to enhance already existing
applications.
Detailed step-by-step procedures are given to enhance typical screens.
After reading this document, you should be able to start enhancing your own
application.
A 3D-Box is a named collection of attributes like color, font, background,
borders ...
There are 3 built-in 3D-Boxes: InBox, OutBox and EditBox. You can create
your own 3D-Boxes and give them your own name. Then, you can map a color
to a 3DBox, and when AniTa renders the screen, all colors mapped to a specific
3DBox will be displayed using the attributes of the 3DBox. The screen text
will not be altered, and there is no mouse actions assigned to a specific 3DBox.
It is currently possible to define 32 different 3DBoxes. And an additional
32 if extended colors is enabled. This gives a total of 64 sets of named
attributes. Typically, you will define 3DBoxes that are used throughout
the entire application.
Examples:
Page header
Lead text left justified
Lead text right justified
Input area
Information area
A Hotspot is an area on the screen that can have display attributes similar to 3DBoxes + mouse actions + tooltips. You can use the attributes to make the hotspot look like a button with background image and colored text, or it can be completely transparent and just display a tooltip when user moves the mouse over. Hotspots "floats" over the screen area. One example of hotspots is the function key area over the screen text area. Hotspots can be created locally in AniTa or by sending escape command strings from the host application.
A Dynamic Hotspot is a normal Hotspot that is created and destroyed automatically by AniTa depending on the screen content. By default, AniTa comes with a set of Dynamic Hotspots like F1, F2, F3, ...Whenever the text F1 is displayed on the screen, a Dynamic Hotspot is created with the exact size of 2 characters, looking like a little button and with the mouse action set to %key%F1, which simulates the same thing as pressing F1 on the keyboard. You can define your own Dynamic Hotspots and the actions when user clicks. The normal set of attributes is very limited making all Dynamic Hotspots look alike, but there is a technique to use the full set of Hotspot attributes. This opens for creative users who wants icons, images and other fancy attributes.
This function allows users to define specific "screens" and have AniTa either recognize them dynamically based on conditions or apply them on command from host. For each of these screens, you can define buttons, actions and fields that will be displayed and performed when the screen becomes active. A screen is active as long as the conditions are satisfied. When a screen goes inactive, buttons are destroyed, actions are reversed and some attributes like persistent colors are removed. Hotscreen definitions are kept in a .hot file in AniTa's working directory.
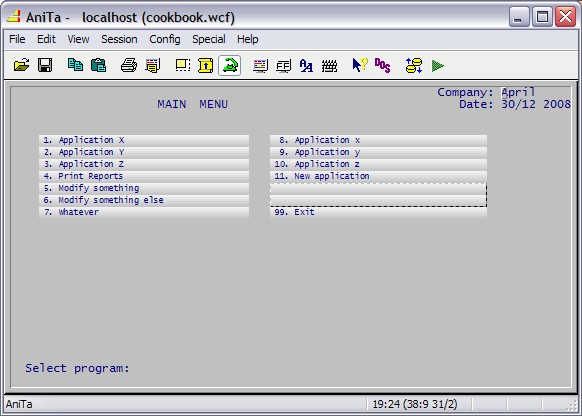
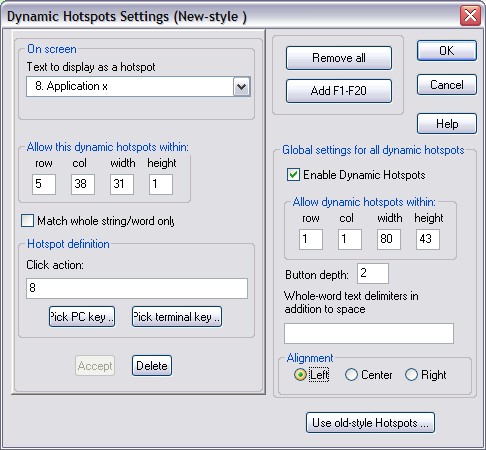
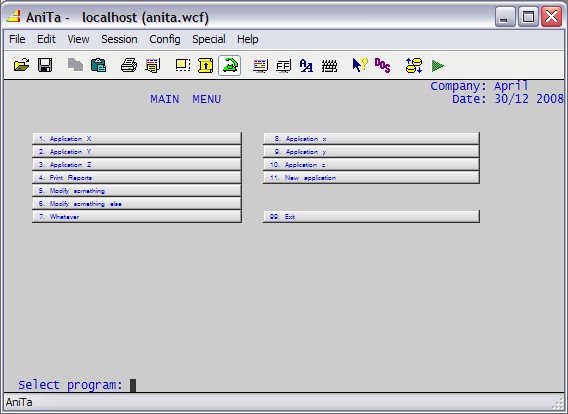
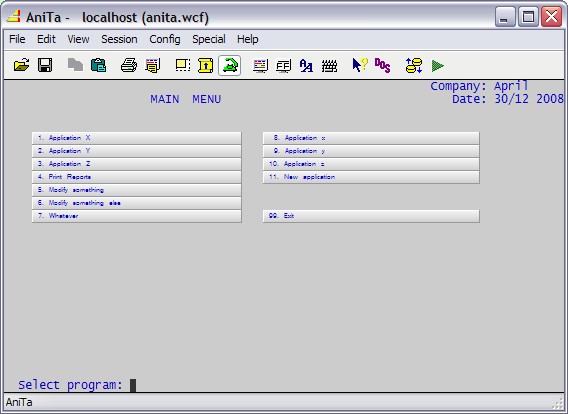
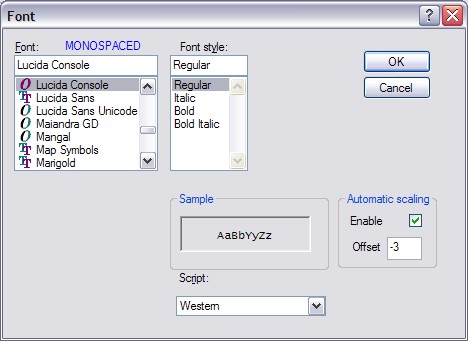
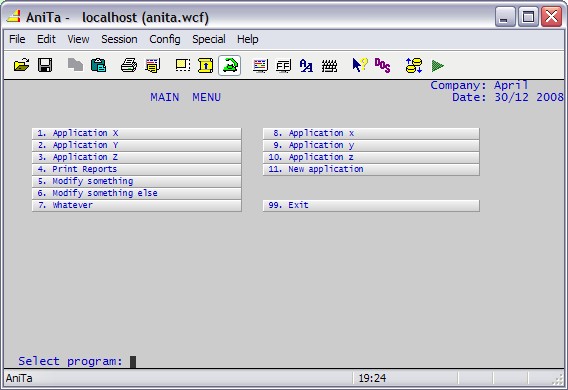
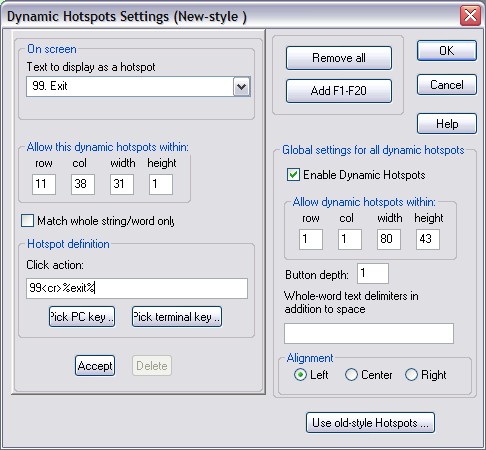
Most applications contains some pages with menus allowing user to select certain pages and tasks in the application framework. You can use Dynamic Hotspots "Create Menu" feature to rapidly create menus by using point-and-click technique. You may have a screen that looks something like this:


Assume you have an application consisting of a large number of screens, and you
want to enhance the look and feel of as many of the screens as you can in the
fastest possible way. You also want the screens to have a consistent and
similar look and feel, and it should be possible to make a change in one single
place that will affect all screens using the same attribute tag (3DBox tag).
You don't want to change the host side since that is a lot of work, and you
still want some of the clients to be able to use other terminal emulators in
parallel to AniTa.
This is a very common situation, and a perfect scenario for the use of AniTa
Hotscreens.
Hotscreens is a framework for screen enhancement. When a Hotscreen becomes active, it can implement many of the fundamental mechanisms like Hotspots and 3D-Box tagging. It can also run Actions when a screen becomes active an "unactions" when it goes out of scope. A Hotscreen can become active depending on screen content, or by command from the application.
When looking at a typical application screen, we often see a coloring scheme that clutters the screen with colors in a way that perhaps made sense at some time, but is now just looking "old-style" and messy. Since most of the 3D-Box screen enhancements in AniTa is based on mapping colors to attributes, it is important that the screen colors and layout is useful. One way to make them useful is to make sure the host application displays colors in the right place so AniTa can map these colors to paint nice looking 3DBox attributes. Another way is to let AniTa do the coloring completely. A third way is to combine the coloring of the host application with the AniTa coloring.
The default AniTa setting is to override the host coloring with AniTa coloring. This typically makes the screen look kind of sophisticated gray background with a few colors based on mapping monochrome attributes like "Reversed" to some color and then mapping that color to some 3D-Box definition like "OutBox".
This section will step-by-step show how to create enhance a screen using the Hotscreen technique. We will put 3D-Box attributes on lead text and input fields. We will first create a few 3DBox styles and then use these 3DBox styles when enhancing the screen. In this example, we will use a coloring attribute called "persistent colors". AniTa will paint the screen with colors that is not affected by the host system, I.E. the colors painted by the Hotscreen function will remain the same even if the host is putting other colors on the screen while the hotscreen is active. This is good since the host cannot destroy what Hotscreen does to the screen.
Before we start creating screen definitions, it's important to go through how and when hotscreens are loaded and saved.
Hotscreens are stored in .hot files and AniTa is reading the .hot file when AniTa is started. When you work with hotscreen dfinitions, you often need to make changes in the .hot file using some external editor outside AniTa. You then need to load the .hot file again in AniTa to see the result of the change you made. Use the %hotload% macro to reload the .hot file. You can also send commands from the host to AniTa to change the name and load the .hot file. See the AniTa Programmer's Reference for details on command controls.
Hotscreen definitions created by the AniTa internal mechanisms are automatically added to the current .hot file. This is why you don't see the AniTa "Save config" active when editing hotscreens in AniTa.
We have found that a good way to work is to use an external editor that is capable of detecting a change in the .hot file and keep it open while doing Hotscreen work in AniTa. We use and recommend Notepad++ since it is free to use and download from Internet and it fills the requirements. The way we normally work with hotscreens is to open the .hot file in Notepad++ and after making a change in AniTa that should update the .hot file, switch to the Notepad++ window and check it out. If I need to make a manual change in the Notepad++ editor, make sure to do a %hotload% right away, else AniTa won't ever re-read that .hot file.
This is an example of a typical legacy application screen. We will apply different attributes using Hotscreen technology.
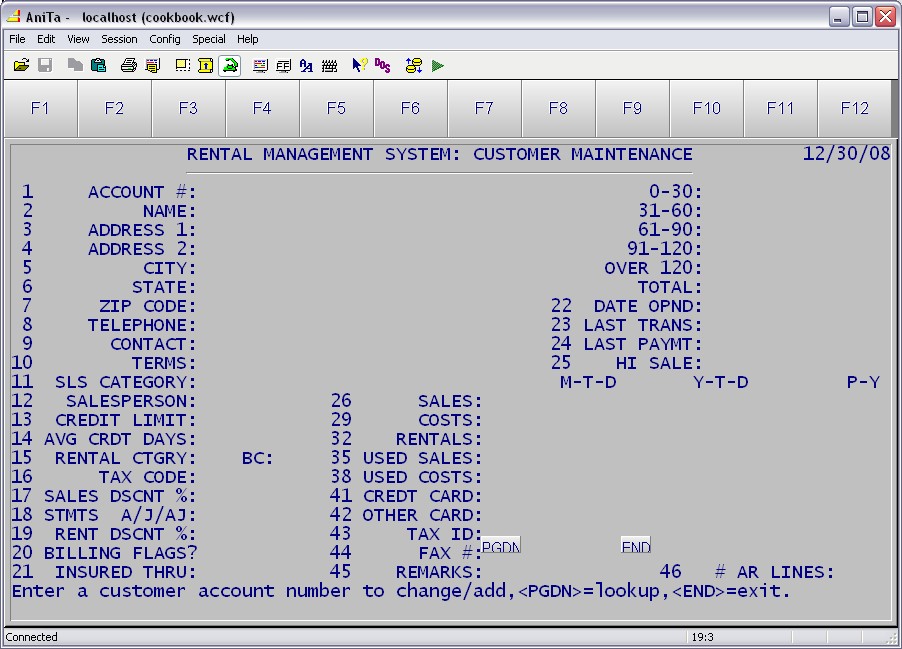
We will now use 3D-Boxes and Hotscreens to make it look something like this:
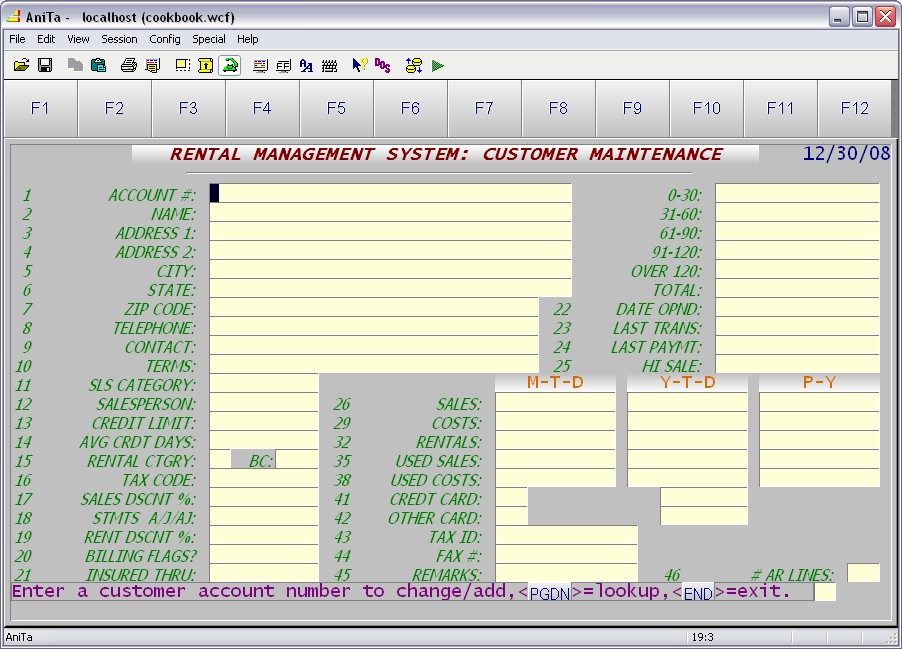
The first thing to do is to have a look at the screen and other screens in the application suit and try to define a set of typical attribute styles. The screen can be divided into a few basic types of information elements:
Background
Page Header
Header
Lead Text
Input
Prompt
We start up by defining 3D-Box styles for the screen elements above (except for the Background). The styles we now define can be used in all screens and whenever you decide to tune the attributes within a style, all screens using that style will be affected.
The first 3D-Box we create will be used for user input and will be based on the original "Edit-Box".
Follow the "Create 3D-Box attribute style" and "Map a color to a
3D-Box attribute style" below.
When this is complete, create 3DBoxes for all the other styles. In order
to make this example easy to follow, use the following color mapping and
attributes:
Head Page: (mapped to: Dark Red Background)
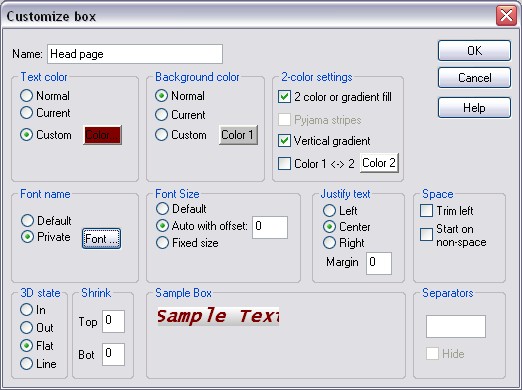
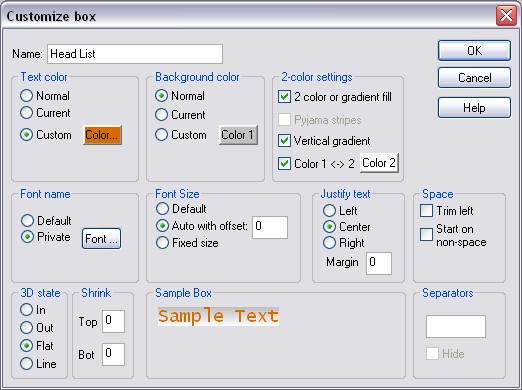
Head List: (Light Red Background))
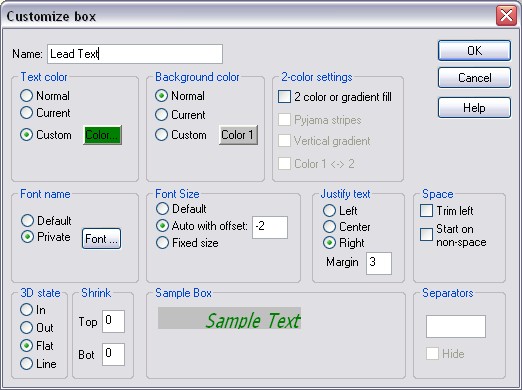
Lead Text: (mapped to: Dark Yellow Background)
Note: The Lead text font in this example is Nina (Italic). It is important to select a Font and size that fits inside the area where the text will be displayed. AniTa will simply clip the text that doesn't fit it the rendering phase.
Prompt: (Dark Magenta Background)
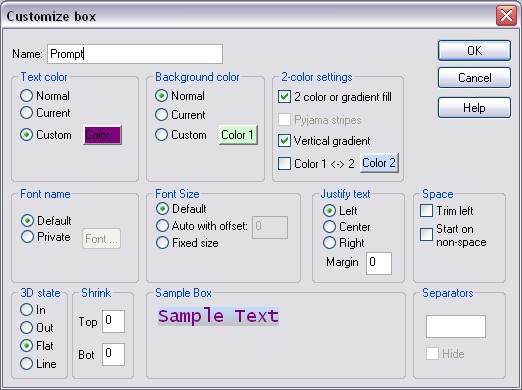
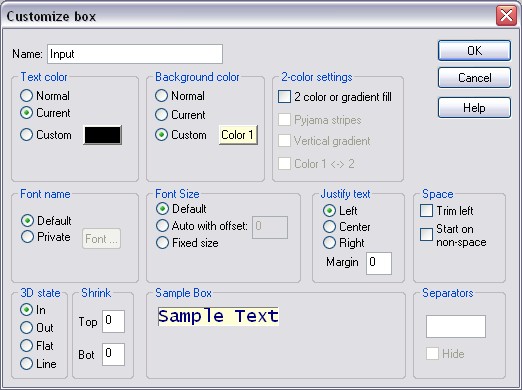
Input: (Light Yellow Background)
Now, the mapping of colors to 3D-Boxes should look something like this:
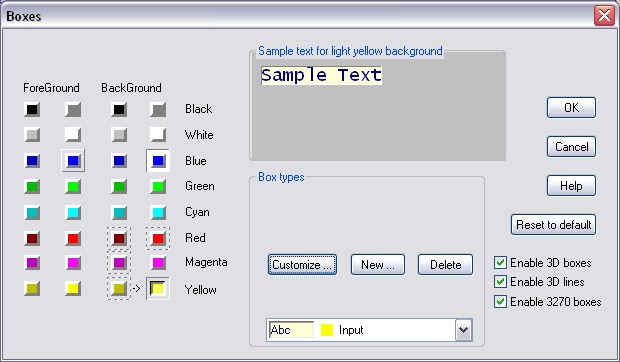
In the AniTa menu select Config->Boxes. This will open the Boxes dialog.
Click the big button in the middle. The one with the text: "Tip: ....". This will remove the big button and open the list of currently defined 3DBox styles. The original list contains 4 styles: None, In-Box, Out-Box and Edit-Box.
Select a box type you want to use as a template for the style you want to create. In this case, we will create a new Edit-Box-style, so select Edit-Box from the list.
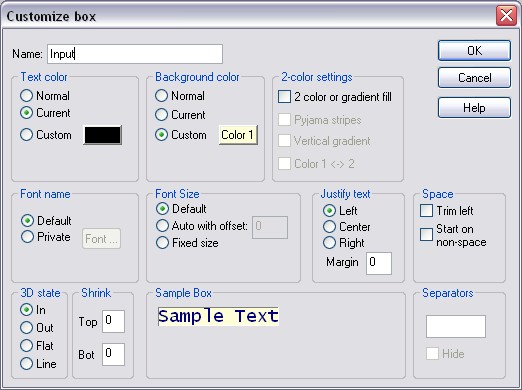
Click "New" to create a copy of "Edit-Box" style. This will open the "Customize Box" property dialog.
Change the name to "Input".
Select Background color to be: Custom and click the related "Color" button next to it. This open a color palette.
Select a very light yellow color (RGB: 255,255,215). Click OK.
Click OK again in the Customize dialog. This will close the Customize property dialog. You are now back in the Boxes dialog.
Click OK again in the Boxes dialog. This will close the Boxes property dialog. You have now created a new 3DBox.
In the AniTa menu select Config->Boxes. This will open the Boxes dialog.
All already mapped colors will have some kind of marker around the color. The marker can look like an In-Box, Out-Box or a dotted line. Click the color you want to map to a 3D-Box. Example: Click the Light Yellow (Bottom Right) Background color. You will now see a little arrow to the left of the button, and the current mapping will show in the sample area and in the list of defined mappings.
Click the big button in the middle. The one with the text: "Tip: ....". This will remove the big button and open the list of all currently defined 3DBox styles. The original list contains 4 styles: None, In-Box, Out-Box and Edit-Box.
Select a box type you want to map Light Yellow Background to. In this case, we will select "Input" from the list.
Click the big button labeled: "Accept mapping of light yellow mapping to Input. You have now mapped light yellow to the box with the name "Inbox".
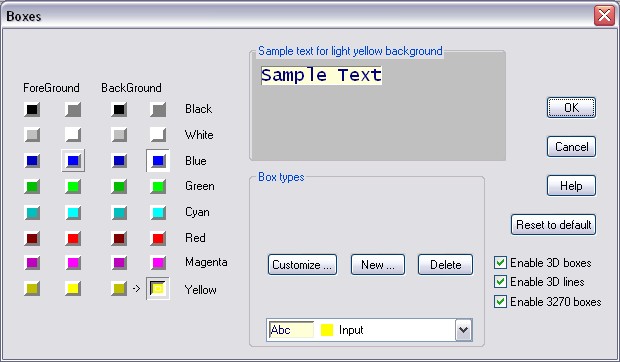
At this point, we have assume you have defined a number of 3D-Box styles. We will now create a few hotscreens that make use of these styles.We will use persistent colors to make the AniTa side of the screen enhancement resist being affected by the host side. All this will create hotscreen actions that paint the screen with the colors mapped to the 3D-Box attribute we have defined and decided to use.
Select a text on the screen that makes this screen unique throughout the application screens. We select: "RENTAL MANAGEMENT SYSTEM: CUSTOMER MAINTENANCE" and Ctrl+Shift+Right click. In the Pop-up menu, Select "Hotscreens->Create new Hotscreen and force it active". You now see a dialog confirming that a hotscreen has been created: "Hotscreen created: s1". Click OK.
You can now verify that the screen is created and which attributes are set for this screen:
Ctrl+Shift+Right click to get the pop-up menu. Select "Hotscreens->Activate, Duplicate, ....". You now see a "Hotscreens" dialog. It can be used to find and force a hotscreen into active state even if the screen content conditions are not satisfied. Check that there is a screen named s1 in the list and that it is active. The text of the first match condition is assigned to the title property and displayed within parenthesis as well as on the AniTa title bar. You can change it at any time. Should look something like this:
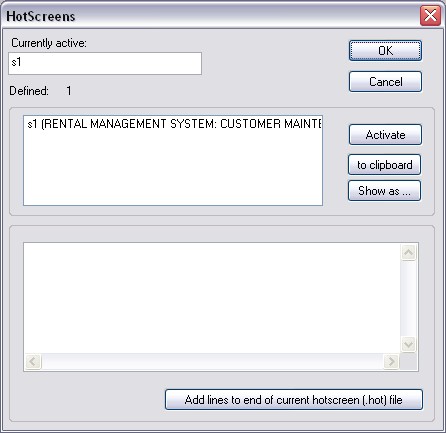
(The .hot file is updated and can also be viewed by any text editor.)
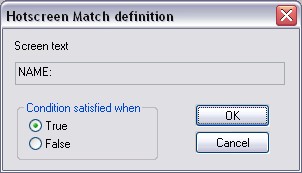
Check the screen matches this way:
Ctrl+Shift+Rightclick to get the pop-up menu. Select
"Hotscreens->Activate, Duplicate, ....". You now see the "Hotscreens"
dialog.
You can inspect the properties of each screen using this dialog.
Click-Select the line with the name s1 and then click "Show as ...". This
will bring up a dialog asking for a new hotscreen name. This can be
useful if you want to make a renamed copy of a screen definition, but for now, we
just want to have a look at the match definitions, so hit enter Enter (OK).
You get yet another warning, but hit enter again to see the full screen
definition in the definition area. Should look like this:
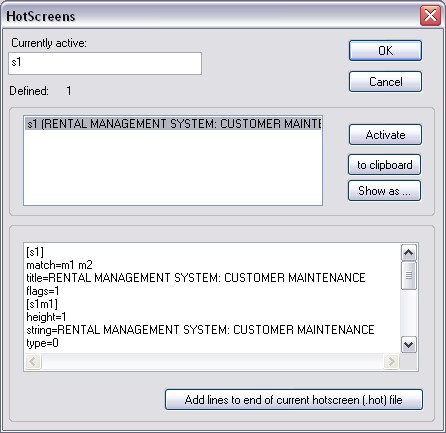
Click OK or Cancel to get rid of the dialog.
Now, the fun really starts and we can get a feeling for the end result of the screen enhancements. We now have a good number of 3D-Box styles, and we also have an active screen that we want to paint with attributes. Let's start off with some Input fields:
Mouse-select some area with input fields. Shift+Ctrl+Right click to get the pop-up menu. Select "Hotscreens->Paint selected Hotscreen area with 3D-Box attributes".
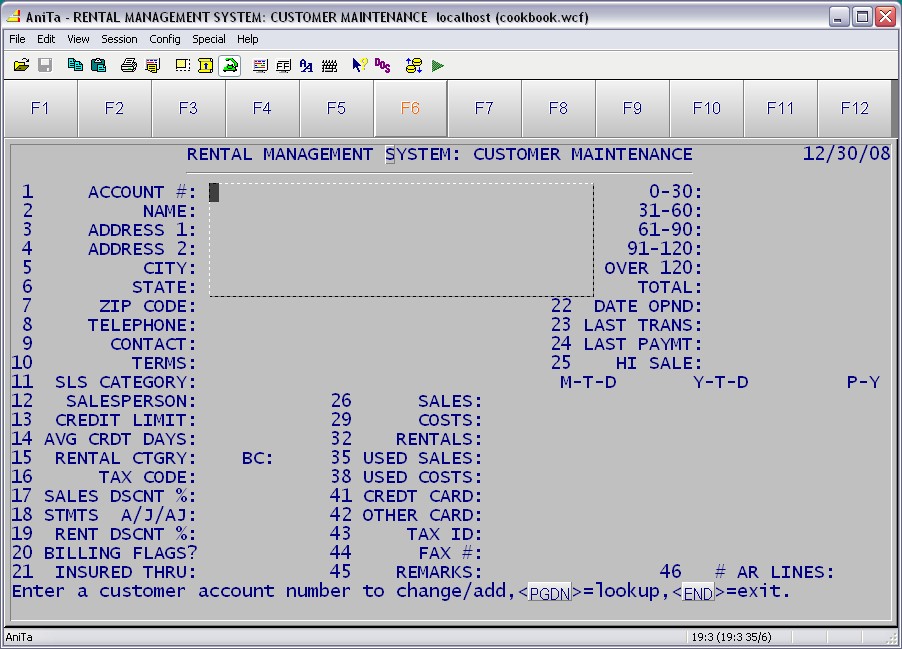
This will show a "Select Box" dialog with all defined 3D-Box styles. Select the one named "Input" and click OK.
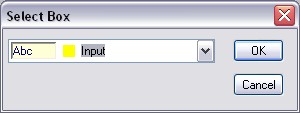
See the resulting screen:
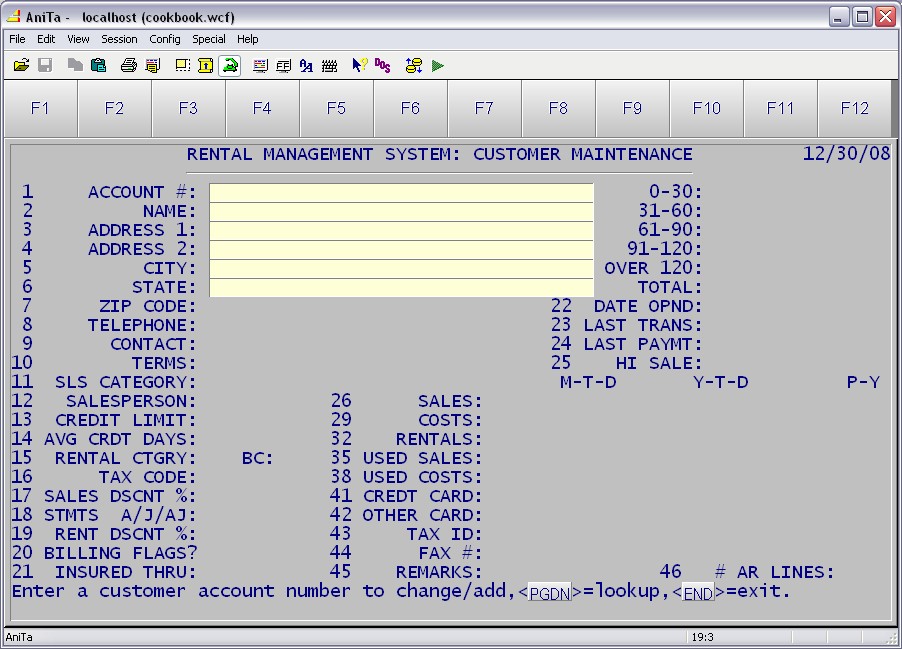
Go through the screen and do the same for all Input fields. Remember, this is just a display attribute and does not define any functional action, so, You must know where the fields start and end. If you make a mistake, don't worry, just paint again with the right attribute (color), or paint with unnamed (none) color to get the background back.
After all input fields are done, the screen should look like this:
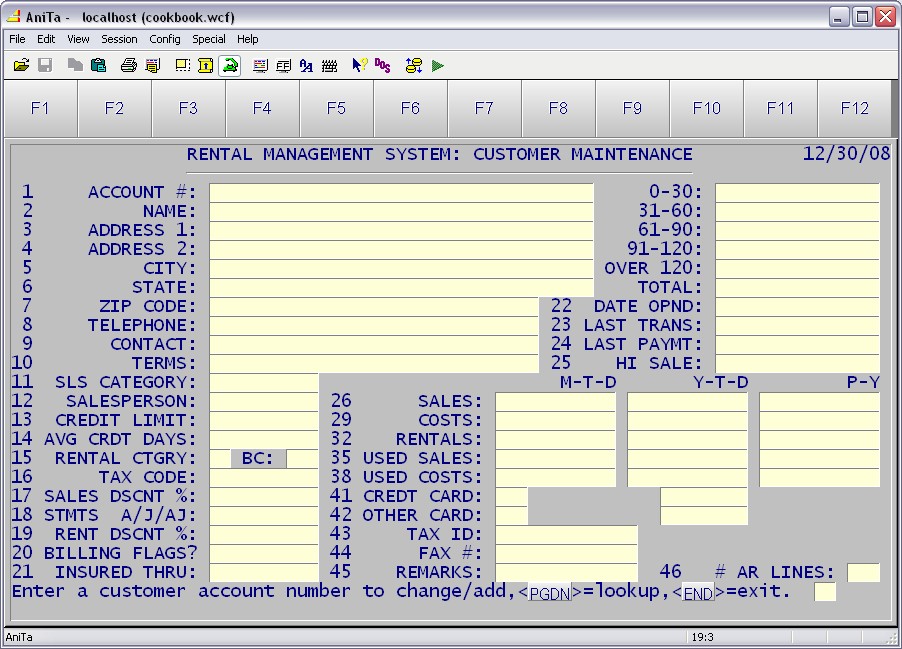
Now, it's time for the Lead text. Lead text is defined to become left justified, so, in order to get the field numbers aligned to the left and the text aligned to the right, we leave one cell grey between the field number and the text. Like this:
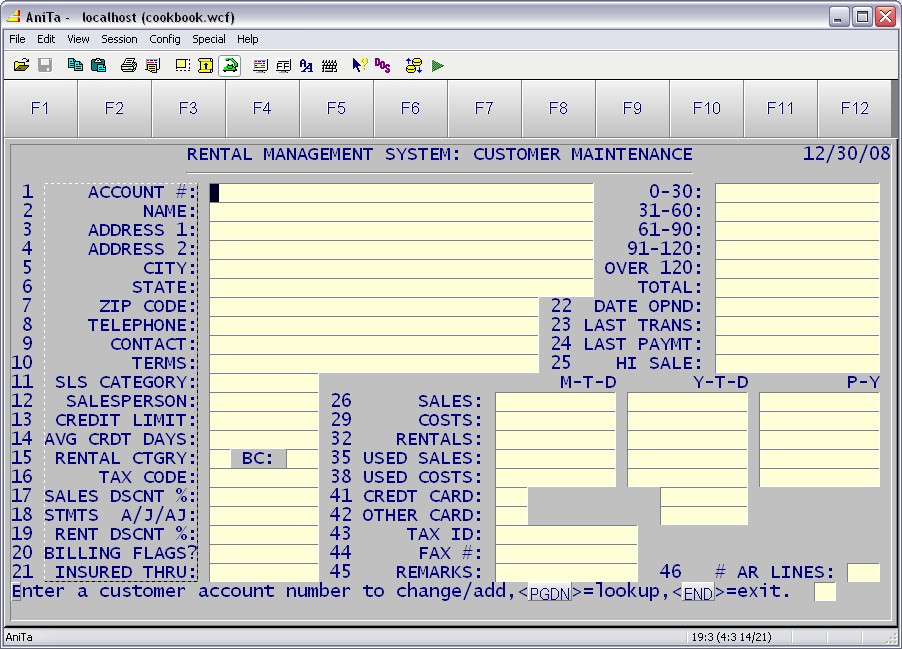
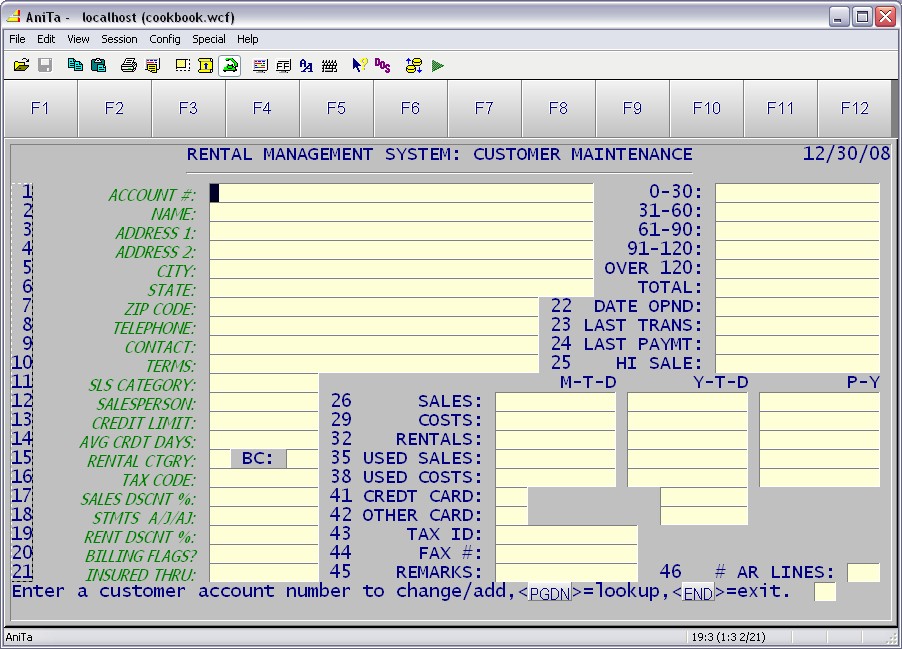
Do all the rest of the Lead text areas, the Head Page, Head List and the bottom prompt text. The final result should look like this:

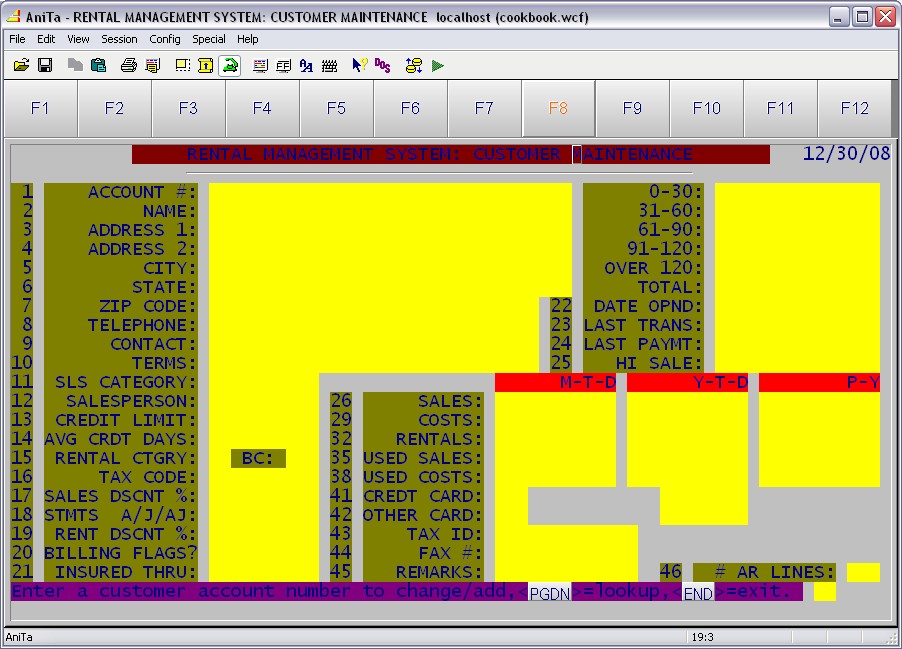
You can now disable 3D-Boxes and check how the screen is colored without the 3D-Box attributes applied:
In the AniTa menu, click Config->Boxes. This opens the 3D-Box dialog. Uncheck "Enable 3D Boxes". Click OK and see the result. Should look like this:
The AniTa Programmer's Reference documents and describes how to create Button
properties in a Hotscreen definition. Over time, we have seen that this
technique can be quite a bit of manual work since every Button must be Edited
manually in the .hot file. And every Button property must be specified
manually.
Here, we show an alternative method that makes the creation, and editing of
buttons in a Hotscreen a lot easier. Instead of using the "Button"
property, we use the "Action" property. The action will display all
buttons defined in a file, and then, when the screen becomes inactive, the
"unaction will remove all buttons defined in a file.
This method makes it very easy to create Button Panels, or individual Buttons,
or a combination. The method of keeping Button definitions in a file is really
nothing new, and is in no way related to Hotscreens. In fact, all the
default Button Panels in AniTa is already defined in such files. The files
typically have the .but extension.
How to create a Button File is described in a separate section below. Walk
through that section before you add your lines to the Hotscreen definition (ButtonPanels).
We
will now describe how to show and remove the Buttons defined in these files from
a Hotscreen definition.
You still need to manually edit the .hot file and add an action to the screen. There are already a number of actions starting with _a, so we just add one that does not start with underscore. (All the current actions have been added when you painted the screen with 3DBox coloring.) The example below shows additions in red. The file containing button definitions is named lookup_exit.but. The action will "play" the button file. The unaction will remove the buttons. Type=3 means that the action should be interpreted as a standard AniTa macro.
[HotScreen] names=s1
[s1] title=RENTAL MANAGEMENT SYSTEM: CUSTOMER MAINTENANCE
flags=1
match=m1 m2
action=a1 _a1 _a2 _a3 _a4 _a5 _a6 _a7 _a8 _a9 _a10
_a11 _a12 _a13 _a14 _a15 _a16 _a17 _a18 _a19 _a20 _a21 _a22 _a23 _a24 _a25 _a26
_a27 _a28 _a29 [s1m1] string=RENTAL MANAGEMENT SYSTEM: CUSTOMER MAINTENANCE
type=0
row=1
col=17
height=1
width=46
condition=Yes
[s1m2]
string=NAME:
type=0
row=4
col=13
height=1
width=5
condition=Yes
[s1a1]
type=3
action=%play%lookup_exit.but
unaction=%unplay%lookup_exit.but
[s1_a1]
action=%setatt%12:1:58:1:0:1:6:1:0
type=3
[s1_a2]
action=%setatt%19:3:33:6:0:1:18:1:0
type=3
.
.
.
This chapter will describe how to work with Buttons defined in files. This is useful when button panels are switched depending on screen content, and very handy in Hotscreens if you want to rapidly create multiple buttons and change the attribute using the Hotspot Visual Editor. Hotscreens can define actions that display and remove all Buttons in a file.
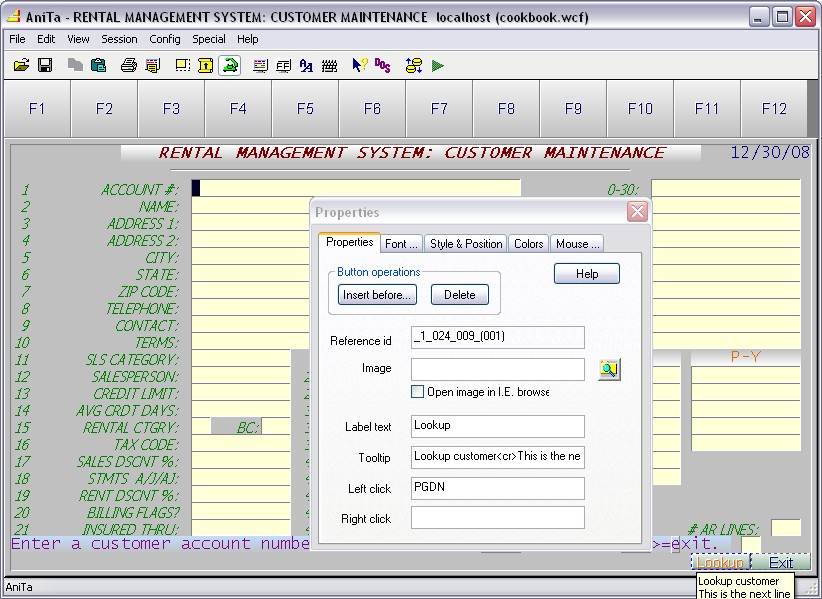
Select an area on the screen where you want a button to be located. Shift+Ctrl+Right click to get the pop-up menu. From the Pop-up menu, select "Create button from selected area". A Hotspot will now be created and the Hotspot dialog will open.
Change the label text to "Lookup" and the Left click to "PGDN".
Select another area on the screen and repeat the steps above. This time, change the label text to "Exit" and the Left click to "DOWN".
The actual keyboard mapping symbolic names may be different depending on your emulation type. PGDN and DOWN may in your own case need to be something else, for example F1 and F2.
Note that you can keep the Hotspot Property dialog open while working with AniTa. Click on the Hotspot you want to edit and see the blue dotted marker indicating which Hotspot you are changing. You can Shift+Click on a Hotspot to select multiple hotspot. Properties like background color and position can be changed for all selected hotspots at the same time. You now have 2 new hotspots on the screen. Could look something like this:
While the Properties dialog is still open, click the AniTa menu: "File->Save Button Panel As ...". This will open the save settings dialog and give you a choice of what you want to save to file. This time, will will just save the two new buttons in the text area, so, make sure the buttons you want to save is marked, then fill in the dialog like this. Click OK.
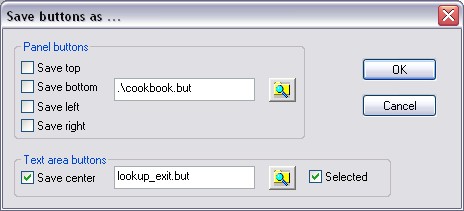
This example will create a panel containing a number of off-screen buttons. This is exactly how the original AniTa F1-Fxx were created. You can use the AniTa menu to Create, Move and Delete panels.
Click AniTa menu: Edit->New Button Panel. This opens the Panel creation dialog.
Specify where the panel should be created, and the number of rows and columns of the panel. Try these settings:
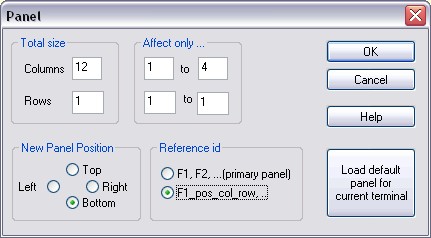
This is what the screen will look like:
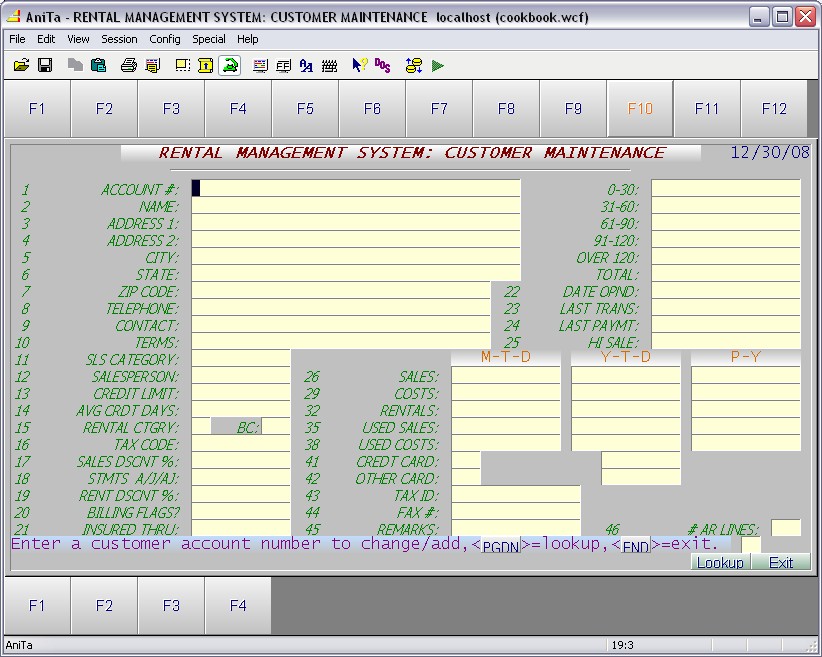
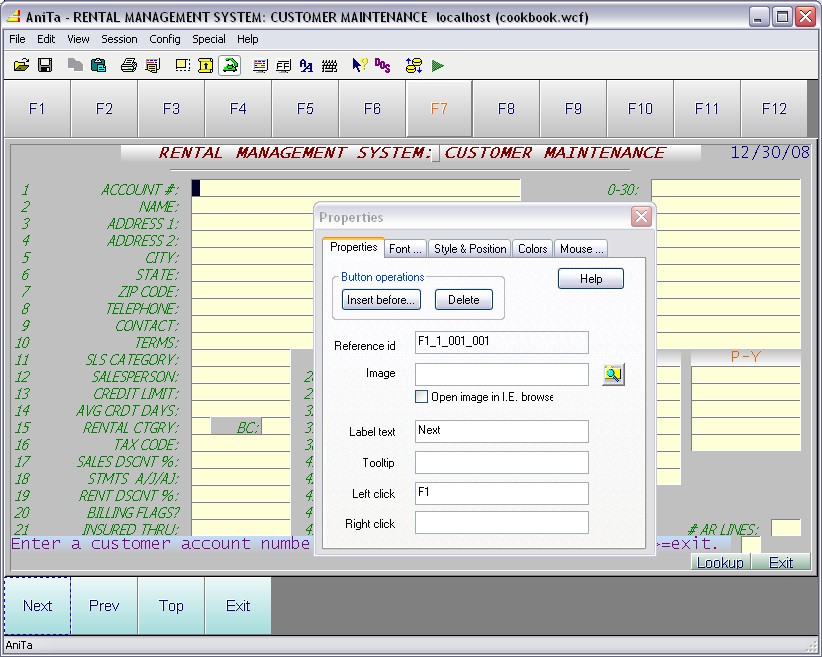
ALT+Click the new F1 button. This will Open the Hotspot editor and you can
modify the properties of this and the other buttons. Note that buttons
located outside the text area cannot me moved or resized using this dialog.
You can now change the buttons background colors and properties to contain Label
Text and Left Click action as follows:
| Label Text | Left Click |
| Next | F1 |
| Prev | F2 |
| Top | HOME |
| Exit | END |
The screen with the new button panel should now look like this.
Note: The bottom panel size was automatically made visible when you
created a new panel and there was no space reserved for the panel. You can
change the panel size in the menu: Config-Preferences->View.
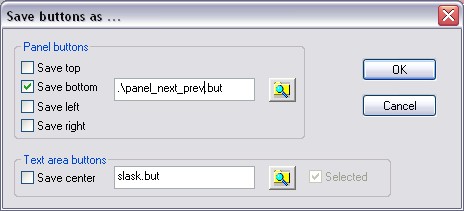
Save the bottom panel in a separate file just like you did with the text-area
buttons:
Click the AniTa menu: "File->Save Button Panel As ...". This will open
the save settings dialog and give you a choice of what you want to save to file.
This time, will will just save the buttons in the bottom panel, so, fill in the
dialog like this. Click OK.
There are many ways to "play" a button definition file. One basic way is to use the %play% macro. This macro will read the file and feed the data from the file into AniTa as if it came from the host. the %unplay% macro will do the same, except that it will remove the buttons instead of creating them. The macros are handy if you want to test the content of some button definition file. Assign one of your function key buttons to play and unplay a file when you left and right-click the button.
Use the %play% macro to load a set of buttons from a file.
Use the %unplay% macro to remove buttons defined in a file.
Example: Open the Hotspot property editor and configure the F2 button like this:
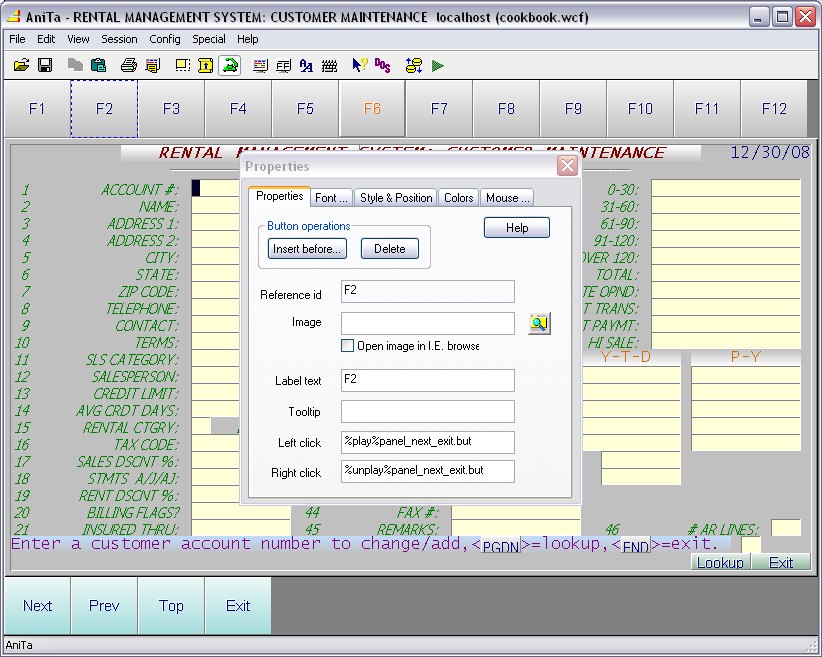
Close the editor and test the panel by Right and Left-clicking the F2 button. You should see the bottom panel come and go.
You are now ready to implement the %play% and %unplay% macros as "actions" to a Hotscreen (Display Button files in a hotscreen).